After your initial click more your cursor to define the direction and length of the first wall segment.
How to have wall length match floor plan in revit.
Select the dropdown and assign wall length as the label for the dimension.
The process of creating a structural wall is similar.
Note how revit present temporary dimensions to help you gauge the length of the wall you are defining see above image wall location lines.
It contains wall compositions view templates and components to help you out.
When generating a wall schedule revit shows that same wall as being 9750mm.
Fast forward to present day we are transitioning to using revit for most of our projects and in the process of setting up our revit standards.
Add one or more instances of a specific type of architectural wall to the building model.
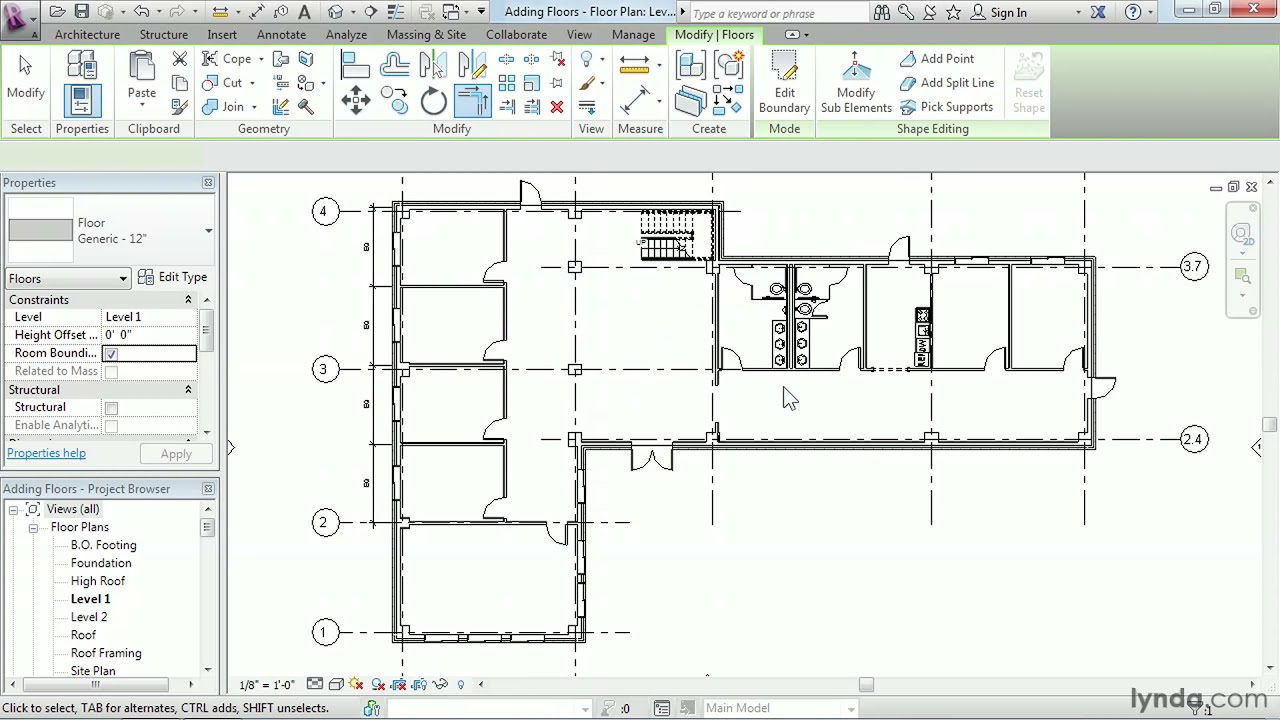
Open a floor plan view or a 3d view.
Revit makes it possible to lay out a rough floor plan without precision and then go back and dial in the dimensions and make quick changes.
The wall schedule s length field is measuring the wall from centerline to centerline not face to face like my dimensions in floor plan view.
Take a length dimension for the wall you want to lock to the global parameter values.
Note you don t receive a visual feedback about the selection of this point in revit.
For instance in plan view i dimensioned a wall from face to face showing a dimension of 10000mm in length.
You can now click in the floor plan view to designate the start point of your wall.
Select the dimension and in the ribbon you will see the term label.
Click architecture tab build panel wall drop down wall.
Select the other end of the wall with similar method.
One of the most useful tools in revit s arsenal is the dimensioning tool.
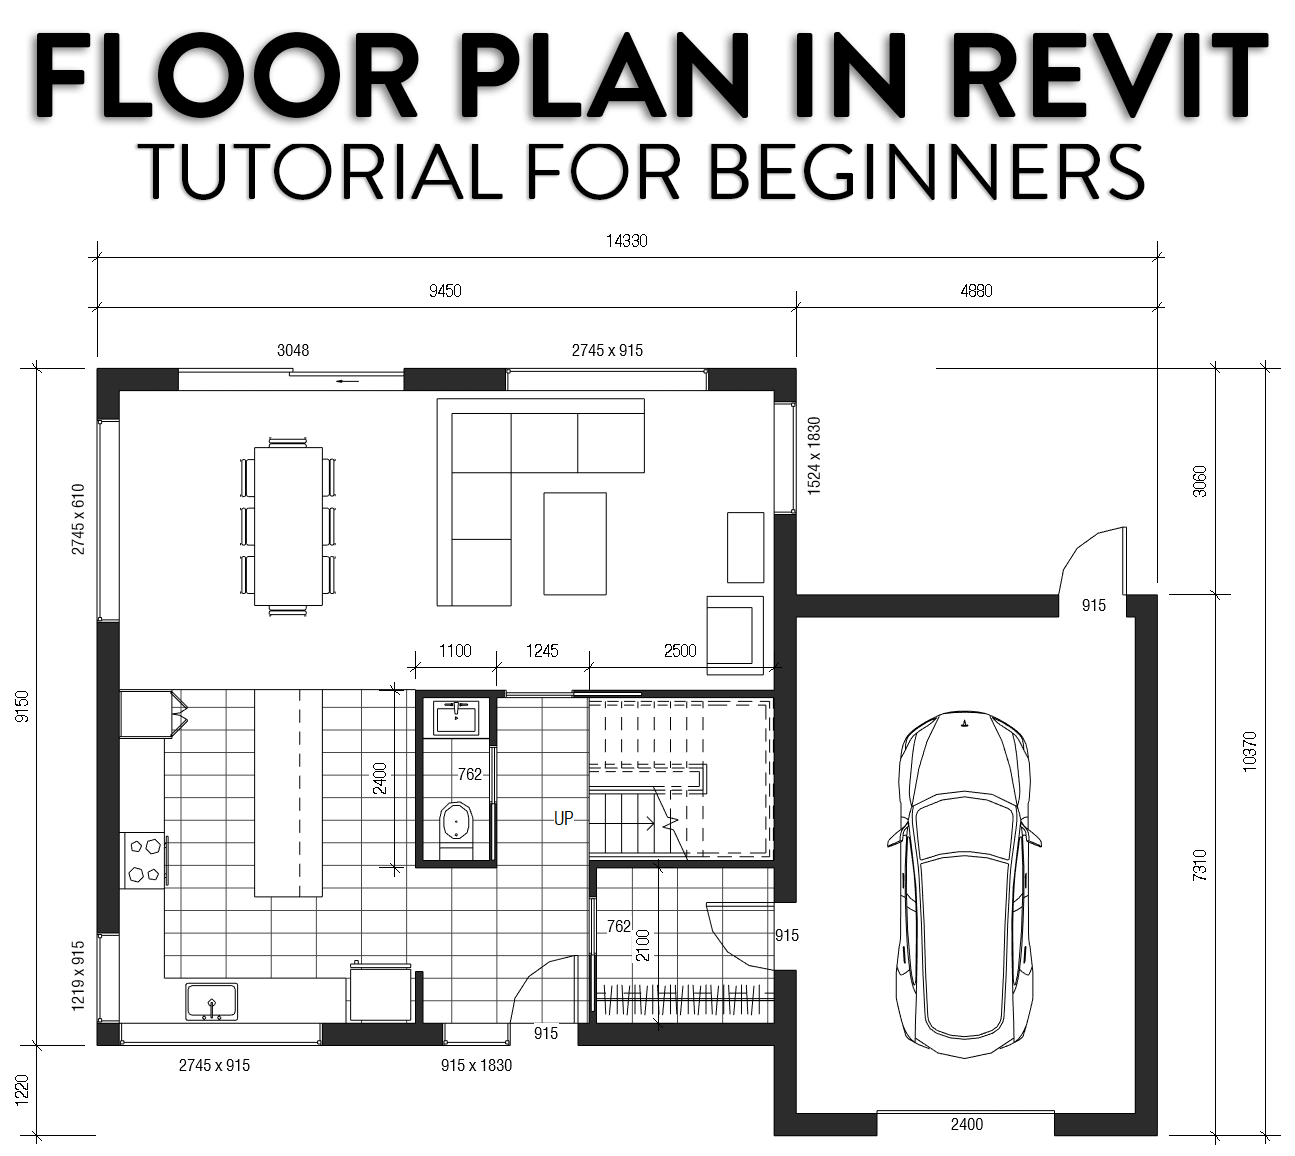
We have prepared a simple template that you can use to create your own floor plan.
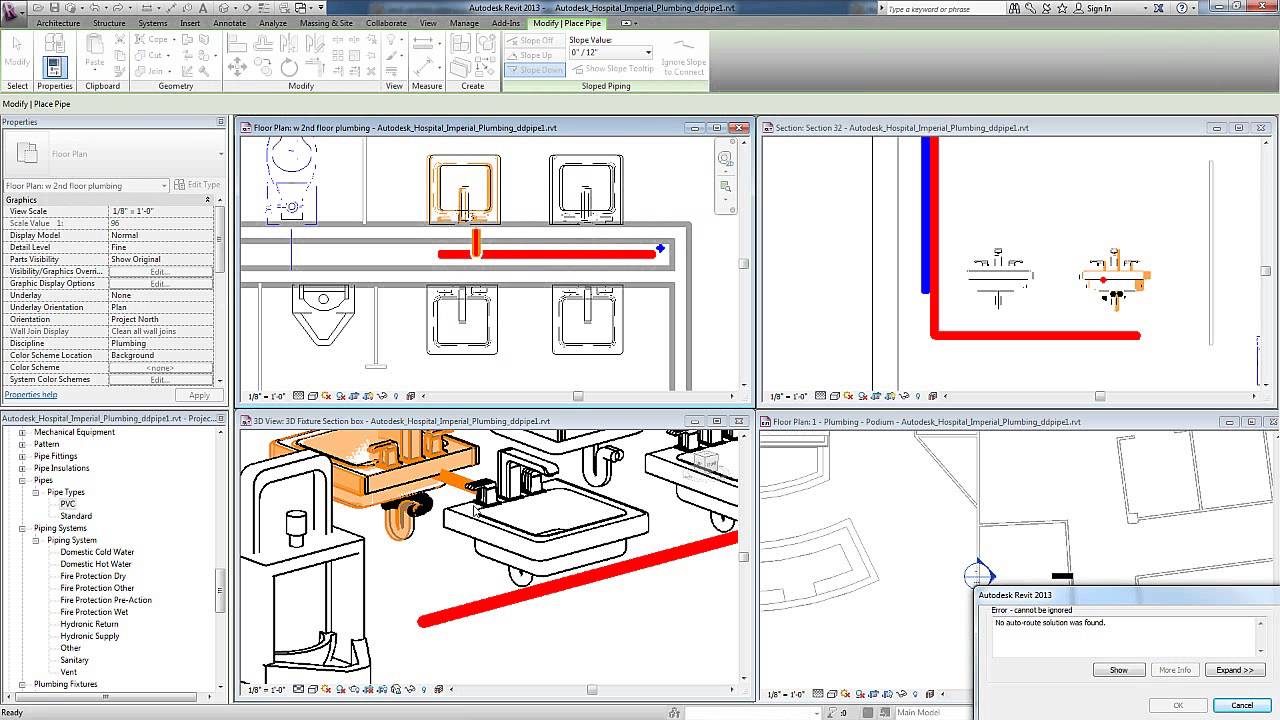
You will find all these components in the view called 02 level 1.
First set the aligned dimension to wall faces individual reference.
Now that we have the revit global parameters and formula set up we can apply it to a dimension.
You have everything you need to complete the floor plan of a house.
The goal is to produce good looking floor plans.
If you want to place a wall type other than the one displayed in the type selector select a different type from the drop down.